If your University-owned PC running Windows 7 or 8 logs in to the SSCC's domain (PRIMO), you can upgrade to Office 2013 very easily using Software Center. This article will show you how.
Click on the Windows logo or Start button, All Programs, Microsoft System Center 2012 R2, Configuration Manager, and then Software Center. (If Software Center is not available then you cannot use this method.) This will give you a list of software you can install using Software Center. Check the box next to Microsoft Office 2013 x86 and click Install Selected.
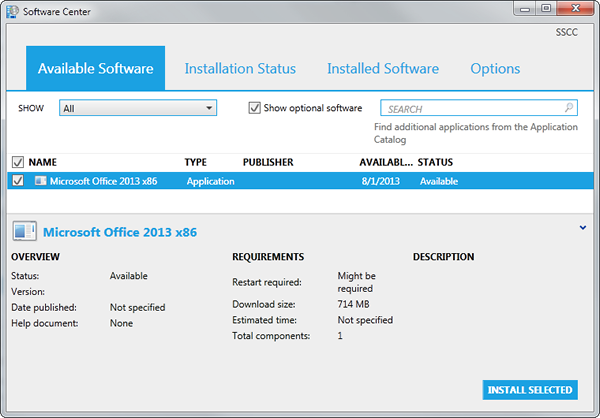
Software Center will then install the new version—feel free to use other programs while it does. When the STATUS of Office 2013 changes to Installed you can close Software Center.
The first time you use Office 2013 you will be asked to activate it. Just choose to activate over the Internet and the process will be completed automatically.
If you have the 64-bit version of Office 2010 (or any 64-bit components) Software Center will not be able to remove them automatically. You can uninstall Office 2010 yourself and then restart Software Center (you may have to press F5 to refresh the list of available programs), or contact the Help Desk to have SSCC staff install it for you.
Last Revised: 8/2/2013